Choose Claude or ChatGPT, then follow that path through all five setup steps. You will finish with one reusable workflow and one bounded Chief of Staff test. If you plan to build and share a working project, continue with the optional GitHub and Vercel steps at the end.
01
Choose one home base
Download the desktop app and sign in.
Pick Claude or ChatGPT for this setup. Keep the account, files, connectors, and test run in one approved workspace.
C
Claude path
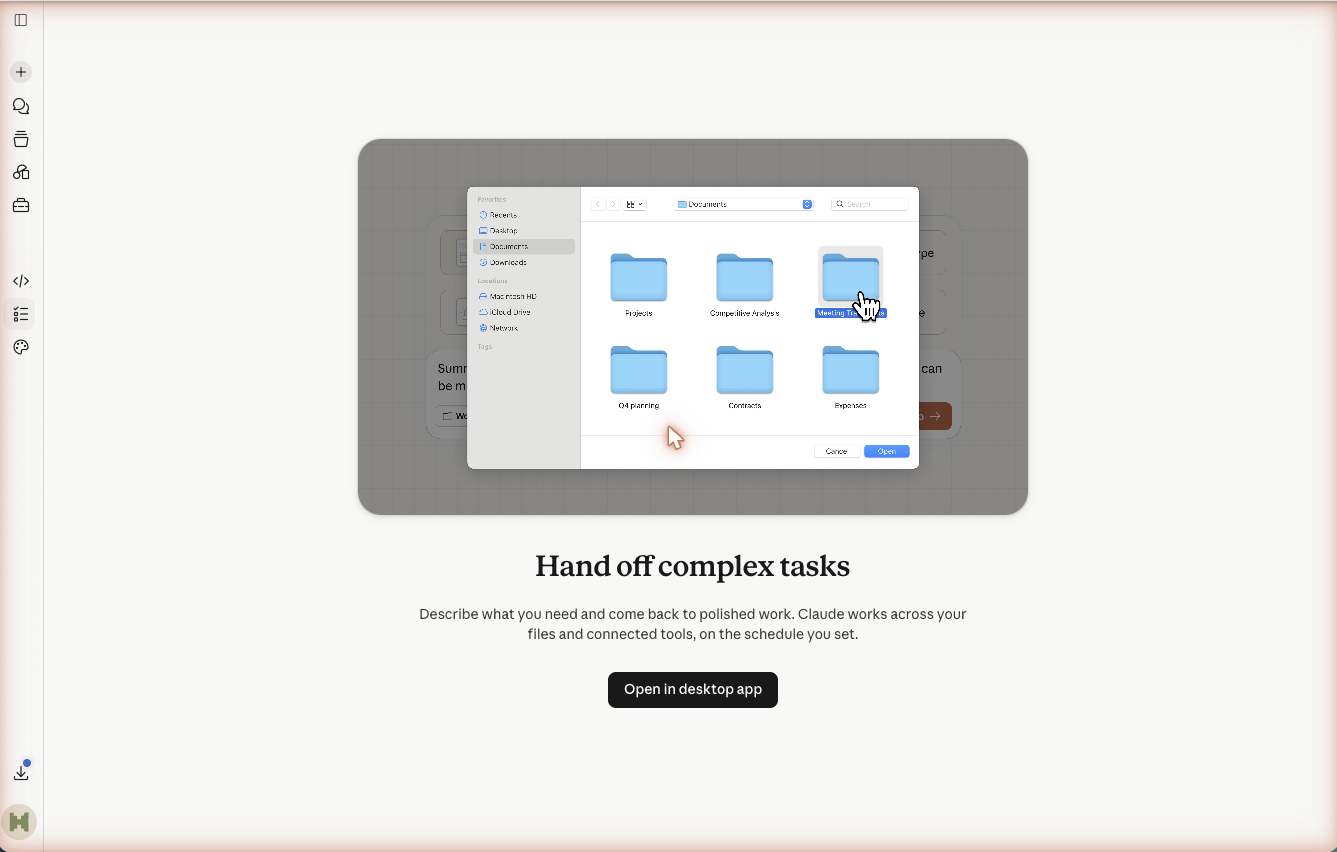
An agent workspace can coordinate several steps across approved files and tools. Access to a folder does not grant authority to act outside the Job. Open the image to inspect the full-size capture.
Do this
1
Open the official Claude download page and choose the installer for Mac or Windows.
2
Run the installer, open Claude Desktop, and sign in with the account approved for this work.
3
Start a new chat, type a synthetic test message, close it, then reopen it from history.
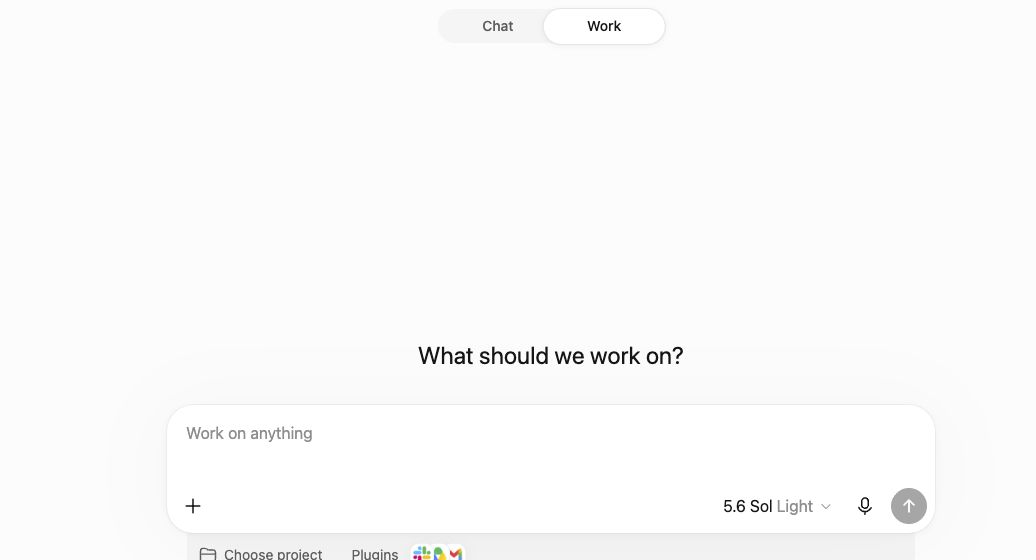
Start in your organization's approved AI workspace and confirm you are signed into the intended account. Open the image to inspect the full-size capture.
Do this
1
Open the official ChatGPT desktop page and choose the installer for your computer.
2
Run the installer, open ChatGPT, and sign in with the account approved for this work.
3
Start a new chat, type a synthetic test message, close it, then reopen it from history.
The approved desktop app is open, you are signed into the intended account, and a synthetic test chat appears in history.
Check before moving on
The account name and workspace match the one your organization approved.
You can start, close, and reopen a chat.
You know where the app stores conversation history and settings.
Human stop rule: Do not sign into a personal account with work data or bypass an organization-managed installation rule.
If this step fails
The installer will not open: confirm your operating system and ask IT whether app installation is managed.
The expected tools are missing: check the account, plan, and workspace before continuing. Availability can differ by plan and administrator policy.
02
Keep the live browser supervised
Install the browser extension or enable approved browser access.
Use browser access only when the work lives on a live page. Start on a public, low-stakes page and keep site permissions narrow.
C
Claude path
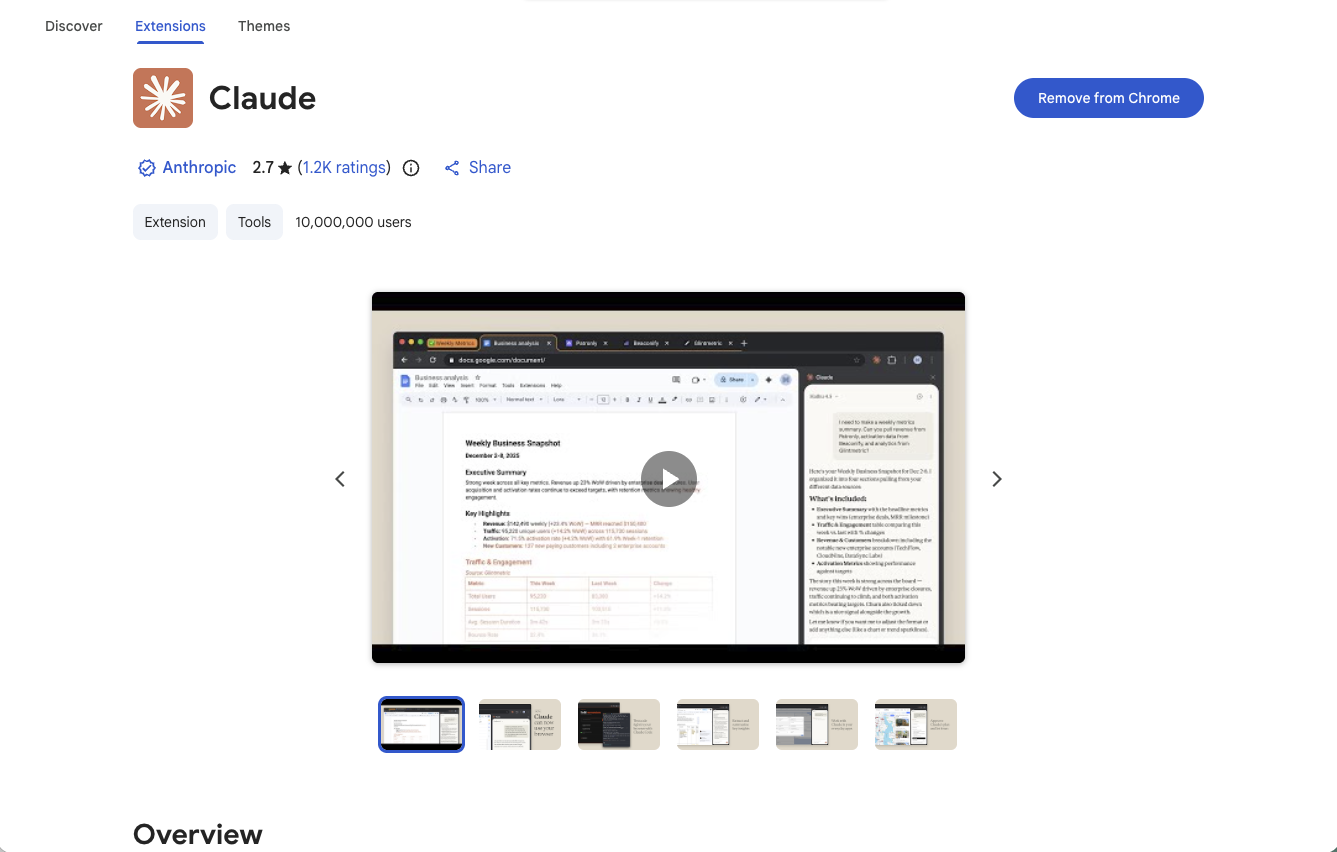
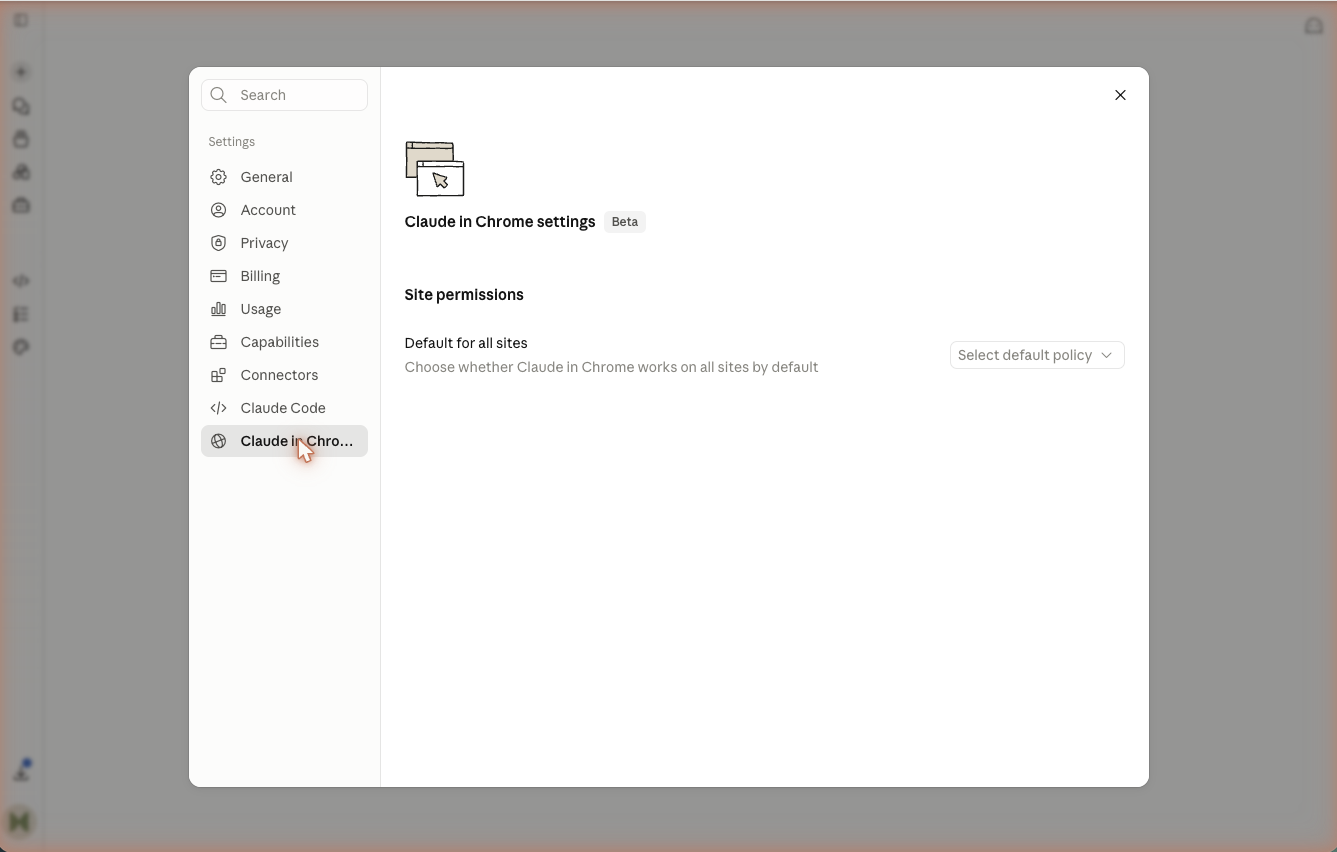
Install only the extension approved by your organization and verify the publisher before continuing. Open the image to inspect the full-size capture.Grant one-site or one-time access for the test. Remove it when the Job no longer needs it. Open the image to inspect the full-size capture.
Do this
1
Confirm you are using Chrome on a computer and that Claude for Chrome is available on your plan and workspace.
2
Open the verified Chrome Web Store listing, confirm Anthropic is the publisher, choose Add to Chrome, and pin the extension.
3
Open the extension, sign in with the same Claude account, and open a public help or documentation page.
4
Ask Claude to summarize the page. Allow access once or only for that site, then review the approved-sites list in extension settings.
Current interface noteThe repository's Claude walkthrough describes this as a paid-plan beta in Chrome. Confirm the live listing and your current plan before relying on it.
G
ChatGPT path
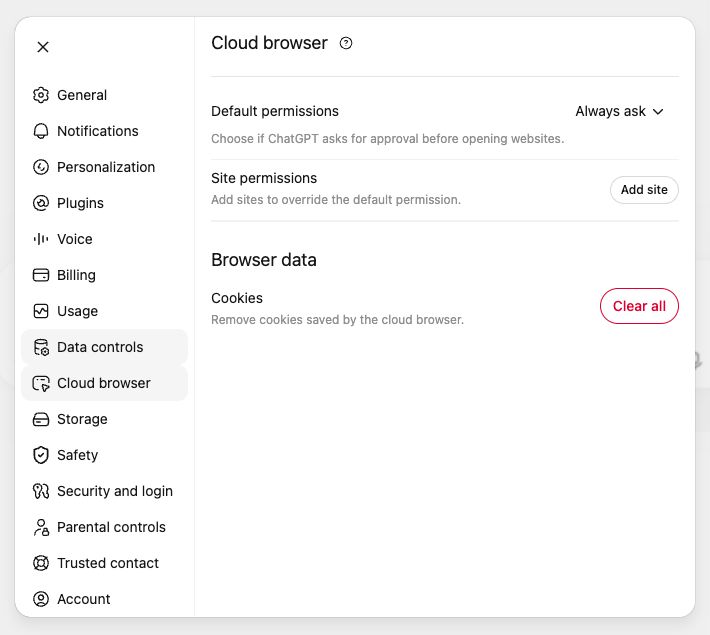
Browser access should be explicit and site-scoped. Product labels change, so verify the live permission before every first run. Open the image to inspect the full-size capture.
Do this
1
Do not install an extension that merely uses the ChatGPT name. This guide does not have a verified first-party ChatGPT extension flow.
2
Open ChatGPT and find its current Web, Search, Browser, or Cloud browser control if your approved account provides one.
3
Open the permission settings, choose Always ask or the narrowest available site rule, and add only a public test site if the interface requires it.
4
Ask for a summary of that public page, compare it with the page yourself, and remove the site's access after the test if it is no longer needed.
Current interface noteChatGPT browser labels and availability vary by account. Use the built-in capability your organization has approved rather than a look-alike browser extension.
What you should see
The approved browser capability can read one public test page, and its site permission is visible and removable.
Check before moving on
The extension publisher or built-in browser capability is the approved one.
Access is limited to one action or one site, not every website by default.
The result matches the visible page and no page content redirected the task.
Human stop rule: Do not test on banking, investing, health, legal, payroll, administrator, or other sensitive accounts. Decline any unexpected action or permission request.
If this step fails
No browser capability appears: continue with ordinary chat and paste only approved text. Browser access is optional for the rest of the setup.
The result includes content not on the page: revoke site access, start a clean chat, and retry with a narrower request on a trusted public page.
03
Connect one source of truth
Add one approved connector and prove it works.
Connect the lowest-risk source that can answer a real question, then verify the answer against the source before adding anything else.
C
Claude path
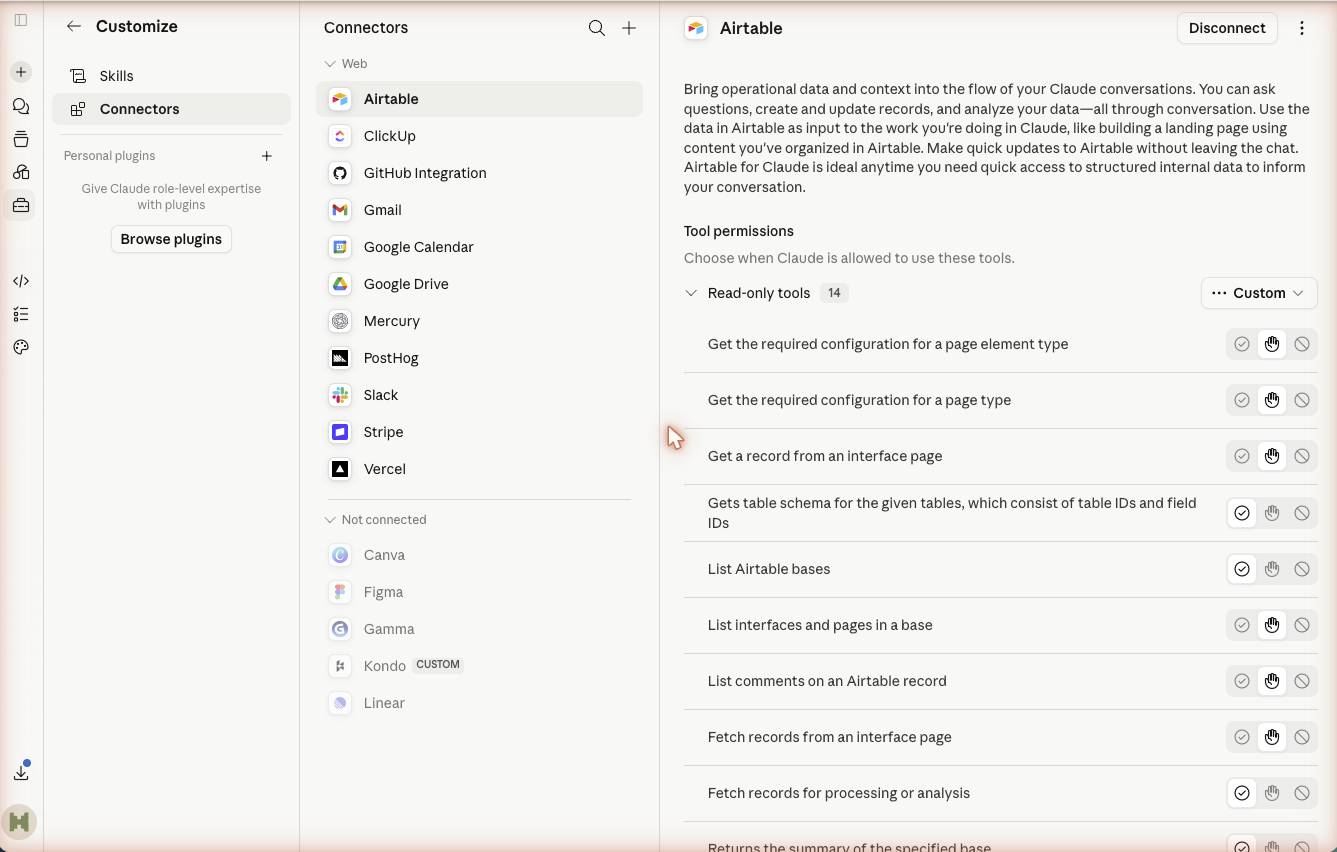
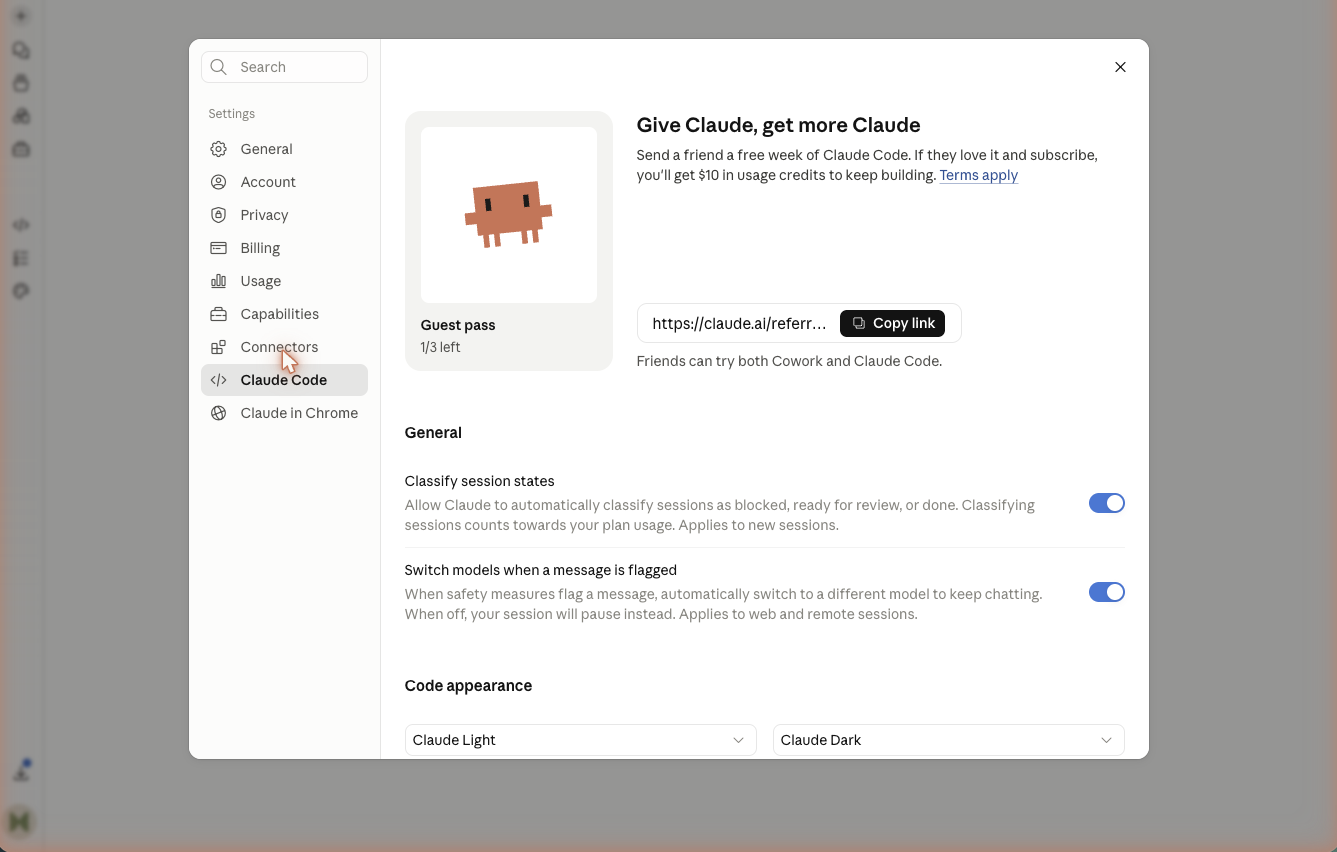
Open the connector settings, select one approved source, and inspect its permission controls before connecting it. Open the image to inspect the full-size capture.
Do this
1
In Claude Desktop, open Settings and find Connectors, Connections, or MCP.
2
Choose one approved, low-risk source such as Calendar or Drive and read every requested permission.
3
Complete the source's sign-in, confirm the intended account and workspace, then return to Claude.
4
Ask one read-only question only that source can answer and require a direct link to the supporting record.
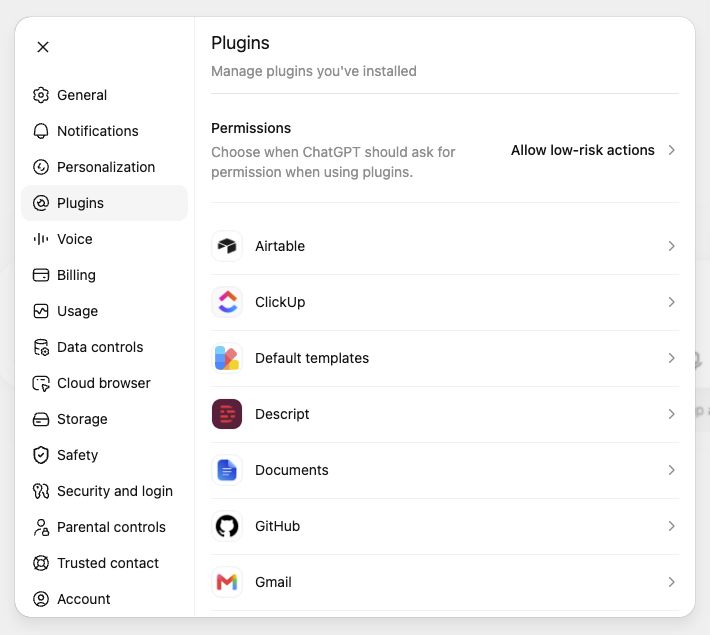
Inspect the permission policy for every connected tool. Start with asking or read-only behavior when the product supports it. Open the image to inspect the full-size capture.
Do this
1
In ChatGPT, open Settings and find Apps, Connectors, or Connected apps.
2
Choose one approved, low-risk source and inspect its permission or confirmation controls before connecting.
3
Complete the source's sign-in, confirm the intended account and workspace, then return to ChatGPT.
4
Ask one read-only question only that source can answer and require a direct link to the supporting record.
One connector shows as active and returns current, recognizable information with a working source link.
Check before moving on
The connected account and workspace are the intended ones.
The source value and link match what you see in the original tool.
The test stayed read-only and used only the one approved connection.
Human stop rule: Do not approve broad permissions you cannot explain. Stop and ask the data or system owner when the requested scope exceeds the test Job.
If this step fails
The connector is unavailable: use an approved export, file, or redacted screenshot and record the missing connection.
The answer is wrong or stale: compare the account, filters, and source timestamp, then disconnect until the cause is clear.
04
Install one reusable workflow
Add the Sea of Demand Skill to a scoped workspace.
Use the same reviewed Sea of Demand instructions on either platform. Claude can install the packaged Skill; ChatGPT keeps the instructions inside one Project.
C
Claude path
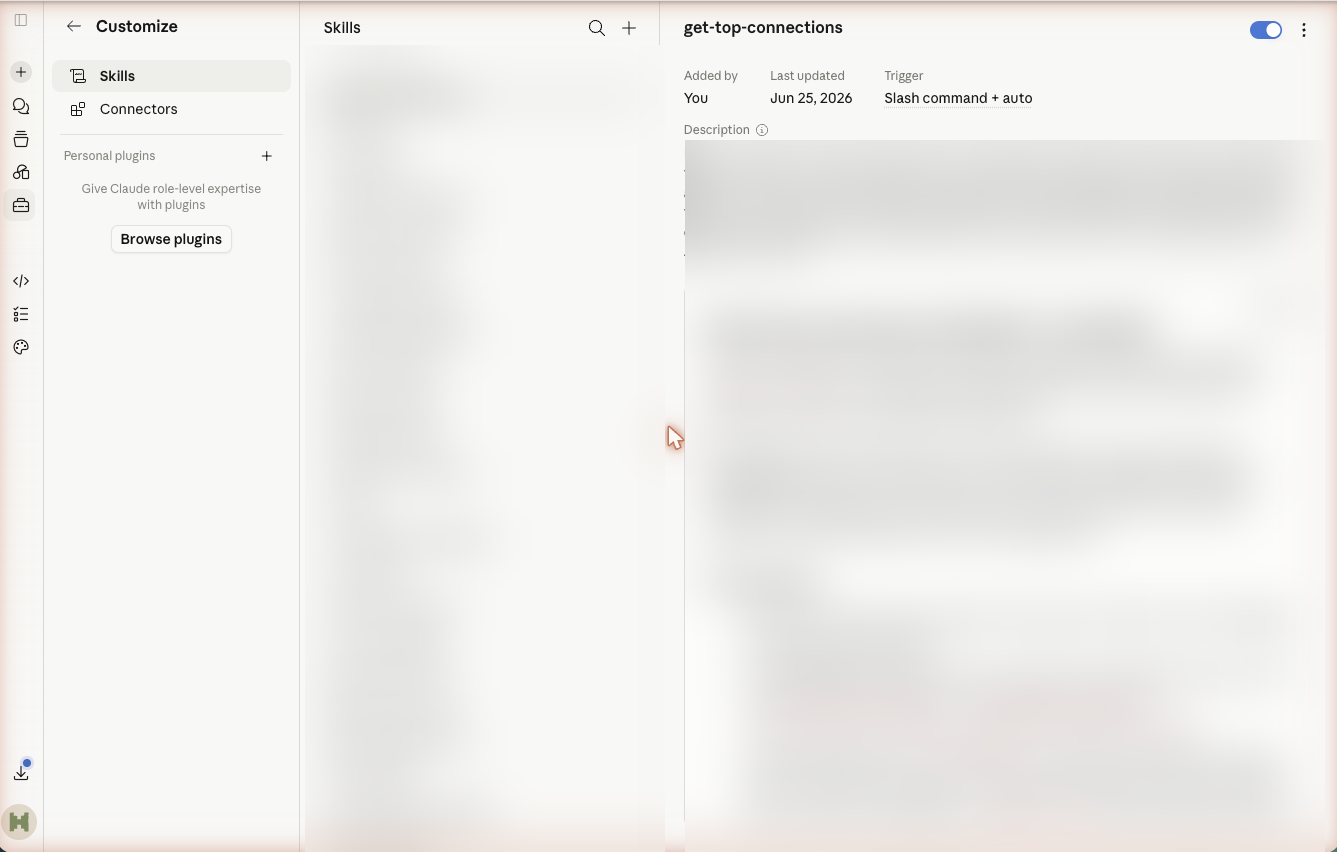
Install the finished Skill in the intended Project, confirm it is enabled, and test its trigger. Open the image to inspect the full-size capture.
Do this
1
Download the repository's sea-of-demand.skill file without renaming or unpacking it.
2
In Claude Desktop, open Skills in Settings or inside the Project that will use it, then choose the option to add a Skill.
3
Select sea-of-demand.skill, confirm the Skill name and trigger, and keep it attached to one Project when that option is available.
4
In a new Project chat, ask the Skill to state its deliverables and the inputs it still needs. Do not start live research yet.
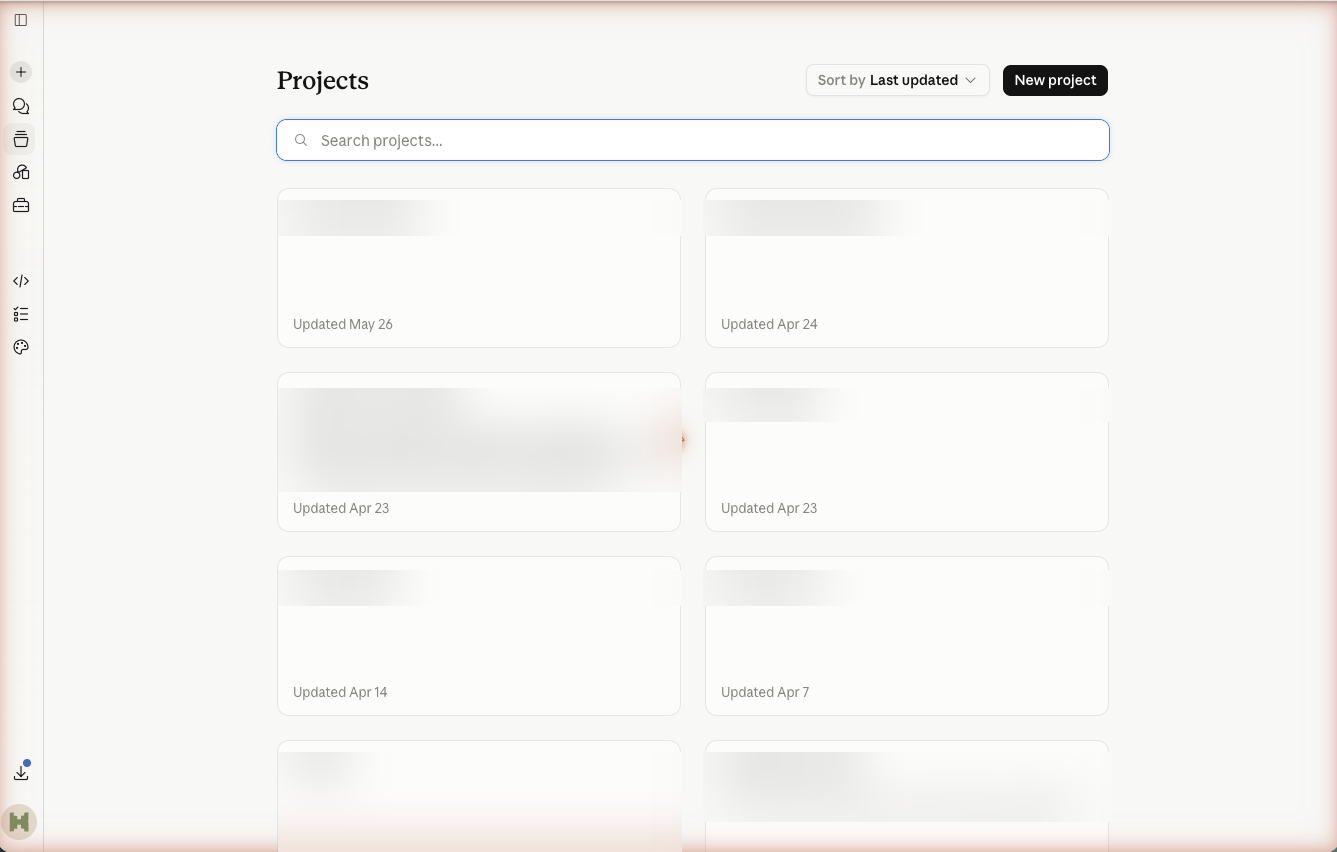
A dedicated Project can keep one workflow's instructions, approved files, and reviewed examples together. Open the image to inspect the full-size capture.
Do this
1
Download sea-of-demand.zip, unzip it, and locate sea-of-demand/SKILL.md.
2
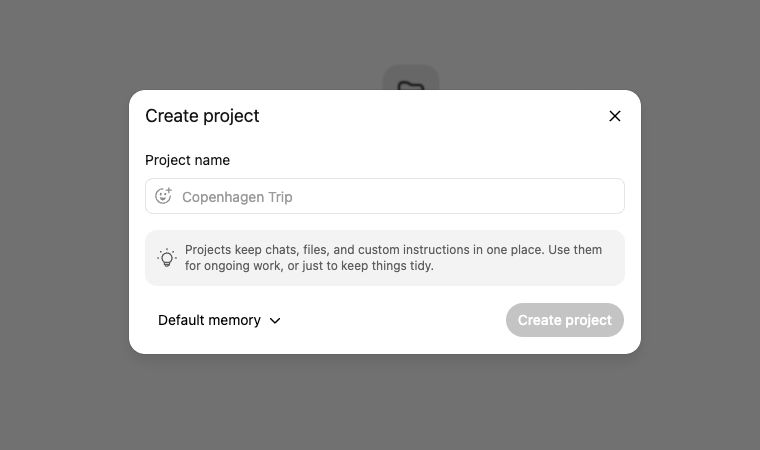
Create a ChatGPT Project named Sea of Demand and keep its memory scoped to that Project when the option is available.
3
Open SKILL.md and copy its contents into the Project instructions. Attach the file as a reference too when your approved workspace supports it.
4
Start a new chat in that Project and ask it to state the workflow's deliverables and the inputs it still needs. Do not start live research yet.
Current interface noteThis is a portable-instructions path, not a claim that ChatGPT has Claude's native Skill installer.
What you should see
Sea of Demand is either an enabled Claude Skill or a scoped ChatGPT Project whose instructions contain the same SKILL.md workflow.
Check before moving on
The workflow is scoped to the intended Project rather than applied to unrelated chats.
A fresh chat can name the expected research deliverables and asks for missing product, customer, and problem context.
No live research, bulk collection, or external action started during the installation check.
Human stop rule: Do not run the Skill against real customer or community data until the research sources, quote use, privacy rules, and reviewer are approved.
If this step fails
Claude does not accept the file: confirm it still ends in .skill and that Skills are enabled for the current account.
ChatGPT does not accept the file attachment: keep its contents in the Project instructions and save the original file with your other workflow evidence.
05
Finish with one bounded agent
Set up the Chief of Staff and run one manual read-only test.
Create a dedicated workspace, save the full template for later, and prove the smallest safe version before scheduling or expanding it.
C
Claude path
Keep each Project focused on one kind of work so its sources, instructions, and reviewed examples stay inspectable. Open the image to inspect the full-size capture.
Do this
1
Create a Claude Project named Chief of Staff and add the one connector you verified in the previous step.
2
Download the full Chief of Staff template and add it to the Project as a reference file. Do not run its recurring-automation instructions during setup.
3
Copy the setup-only prompt below into a new Project chat. Replace [REVIEWER] and [ONE APPROVED SOURCE].
4
Run it once, inspect every source link, and save the brief plus your corrections in the Project.
A dedicated Project can keep one workflow's instructions, approved files, and reviewed examples together. Open the image to inspect the full-size capture.
Do this
1
Create a ChatGPT Project named Chief of Staff and add the one connector you verified in the previous step.
2
Download the full Chief of Staff template and add it to the Project as a reference file. Do not run its recurring-automation instructions during setup.
3
Copy the setup-only prompt below into the Project instructions or a new Project chat. Replace [REVIEWER] and [ONE APPROVED SOURCE].
4
Run it once, inspect every source link, and save the brief plus your corrections in the Project.
You are my bounded Chief of Staff for this setup test.

Prepare one ranked priority brief for [REVIEWER] using only [ONE APPROVED SOURCE]. Stay read-only.

For each priority:
- Explain why it matters now.
- Link to the evidence.
- Name the owner only when the source states one.
- Recommend the smallest useful next step.

Separate confirmed facts from questions. Do not send or draft messages, change records, download files, publish, purchase, or create an automation.

Stop before using another source or tool, when evidence is missing or conflicting, or when an action could affect another person. End by asking me to review the brief.
What you should see
A Project named Chief of Staff contains the full reference template, a setup-only boundary, one approved connection, and one saved read-only brief.
Check before moving on
The first run used exactly one approved source and every priority links to its evidence.
The brief separates facts from questions and does not invent an owner, date, or commitment.
No message, record, file, event, purchase, publication, or automation was created or changed.
A named reviewer can accept, correct, or reject the result before the next run.
Human stop rule: Do not create a recurring automation or grant Change, Send, or Publish authority until repeated manual runs pass review and the accountable owner approves the expansion.
If this step fails
The brief is generic: narrow the source, state the review date, and define what qualifies as a priority.
A link or claim cannot be verified: mark it unresolved, remove it from the ranked brief, and correct the source access before rerunning.
The agent tries to act or schedule: stop the run, remove the extra capability, and repeat the setup-only prompt in a clean chat.
Optional build setup
Put a project on GitHub and Vercel.
Continue here when you want Claude Code or Codex to work on a reviewable project and create a shareable preview.
06
Optional build setup
Give your project a safe GitHub home.
Use a private practice repository to keep a reviewable history and give Claude Code or Codex one clearly bounded project folder.
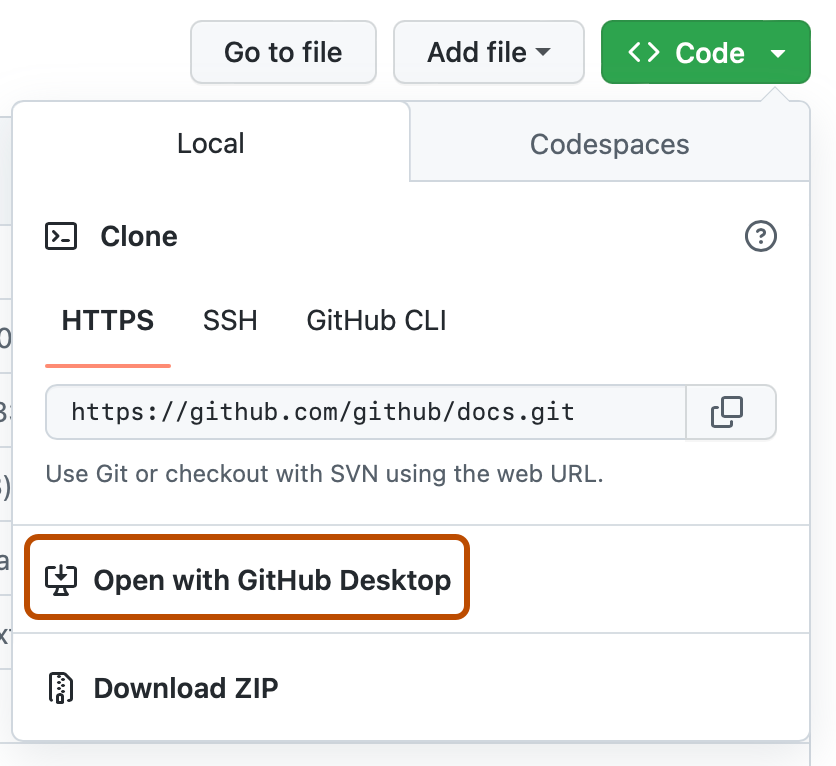
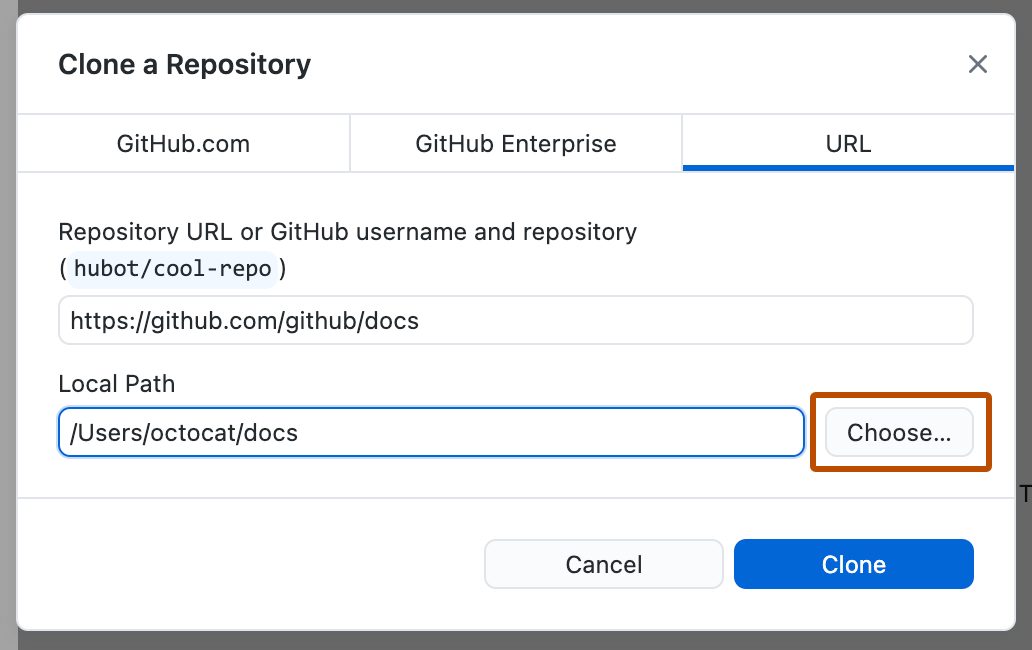
From a repository's Code menu, choose Open with GitHub Desktop to bring the approved project onto your computer. Open the image to inspect the full-size capture.Choose a local folder you can recognize later, then clone the repository into that location. Open the image to inspect the full-size capture.
C
Claude Code path
Open only the folder or workspace assigned to the Job before starting a Claude Code task. Open the image to inspect the full-size capture.
Do this
1
Open GitHub's signup page. Enter an organization-approved email address, create your username and password, then follow the prompts to create the account. If your company provides a managed account, use that account instead.
2
Open GitHub's verification email and verify the address. Then enable two-factor authentication and save the recovery codes somewhere approved and separate from the project folder.
3
Install GitHub Desktop and sign in through the browser. On GitHub, create a private practice repository with a README. If your organization already assigned a repository, clone that one instead of creating another.
4
Choose Open with GitHub Desktop from the repository's Code menu. Pick a local folder you will recognize, then select Clone.
5
Open Claude Code in the Claude Desktop app and select that cloned folder. Terminal users can open a terminal in the folder and run claude.
6
Ask Claude Code: ‘Read the README and git status. Tell me what this project contains and propose one small change. Do not edit, install, commit, or push anything.’
Start in your organization's approved AI workspace and confirm you are signed into the intended account. Open the image to inspect the full-size capture.
Do this
1
Open GitHub's signup page. Enter an organization-approved email address, create your username and password, then follow the prompts to create the account. If your company provides a managed account, use that account instead.
2
Open GitHub's verification email and verify the address. Then enable two-factor authentication and save the recovery codes somewhere approved and separate from the project folder.
3
Install GitHub Desktop and sign in through the browser. On GitHub, create a private practice repository with a README. If your organization already assigned a repository, clone that one instead of creating another.
4
Choose Open with GitHub Desktop from the repository's Code menu. Pick a local folder you will recognize, then select Clone.
5
In the ChatGPT desktop app, choose where to work by opening that cloned folder. Select Codex, then start a New chat in the folder.
6
Ask Codex: ‘Read the README and git status. Tell me what this project contains and propose one small change. Do not edit, install, commit, or push anything.’
GitHub Desktop shows the intended private repository, the project exists in a known local folder, and your coding app can inspect that same folder without changing it.
Check before moving on
The GitHub account and repository owner are the ones your organization approved.
The repository is private unless a named owner explicitly approved public access.
The app names the correct folder and git status before proposing work.
No password, API key, .env file, customer data, or other secret was added to the repository or chat.
Human stop rule: Do not make the repository public, add organization members, commit secrets, or let the app edit, commit, or push until the account, folder, and starting git status are correct.
If this step fails
The repository will not open in GitHub Desktop: sign into the same GitHub account in the browser and desktop app, then confirm you can access the repository.
The coding app sees the wrong files: close the task and reopen the exact folder shown as Local Path in GitHub Desktop.
Git reports changes before you begin: stop and ask the repository owner whether those changes should be saved, reviewed, or removed.
07
Optional build setup
Connect GitHub to Vercel and review a preview.
Vercel connects to GitHub, not directly to the coding app. Claude Code or Codex changes the local clone, GitHub records the reviewed branch, and Vercel turns that branch into a preview link.
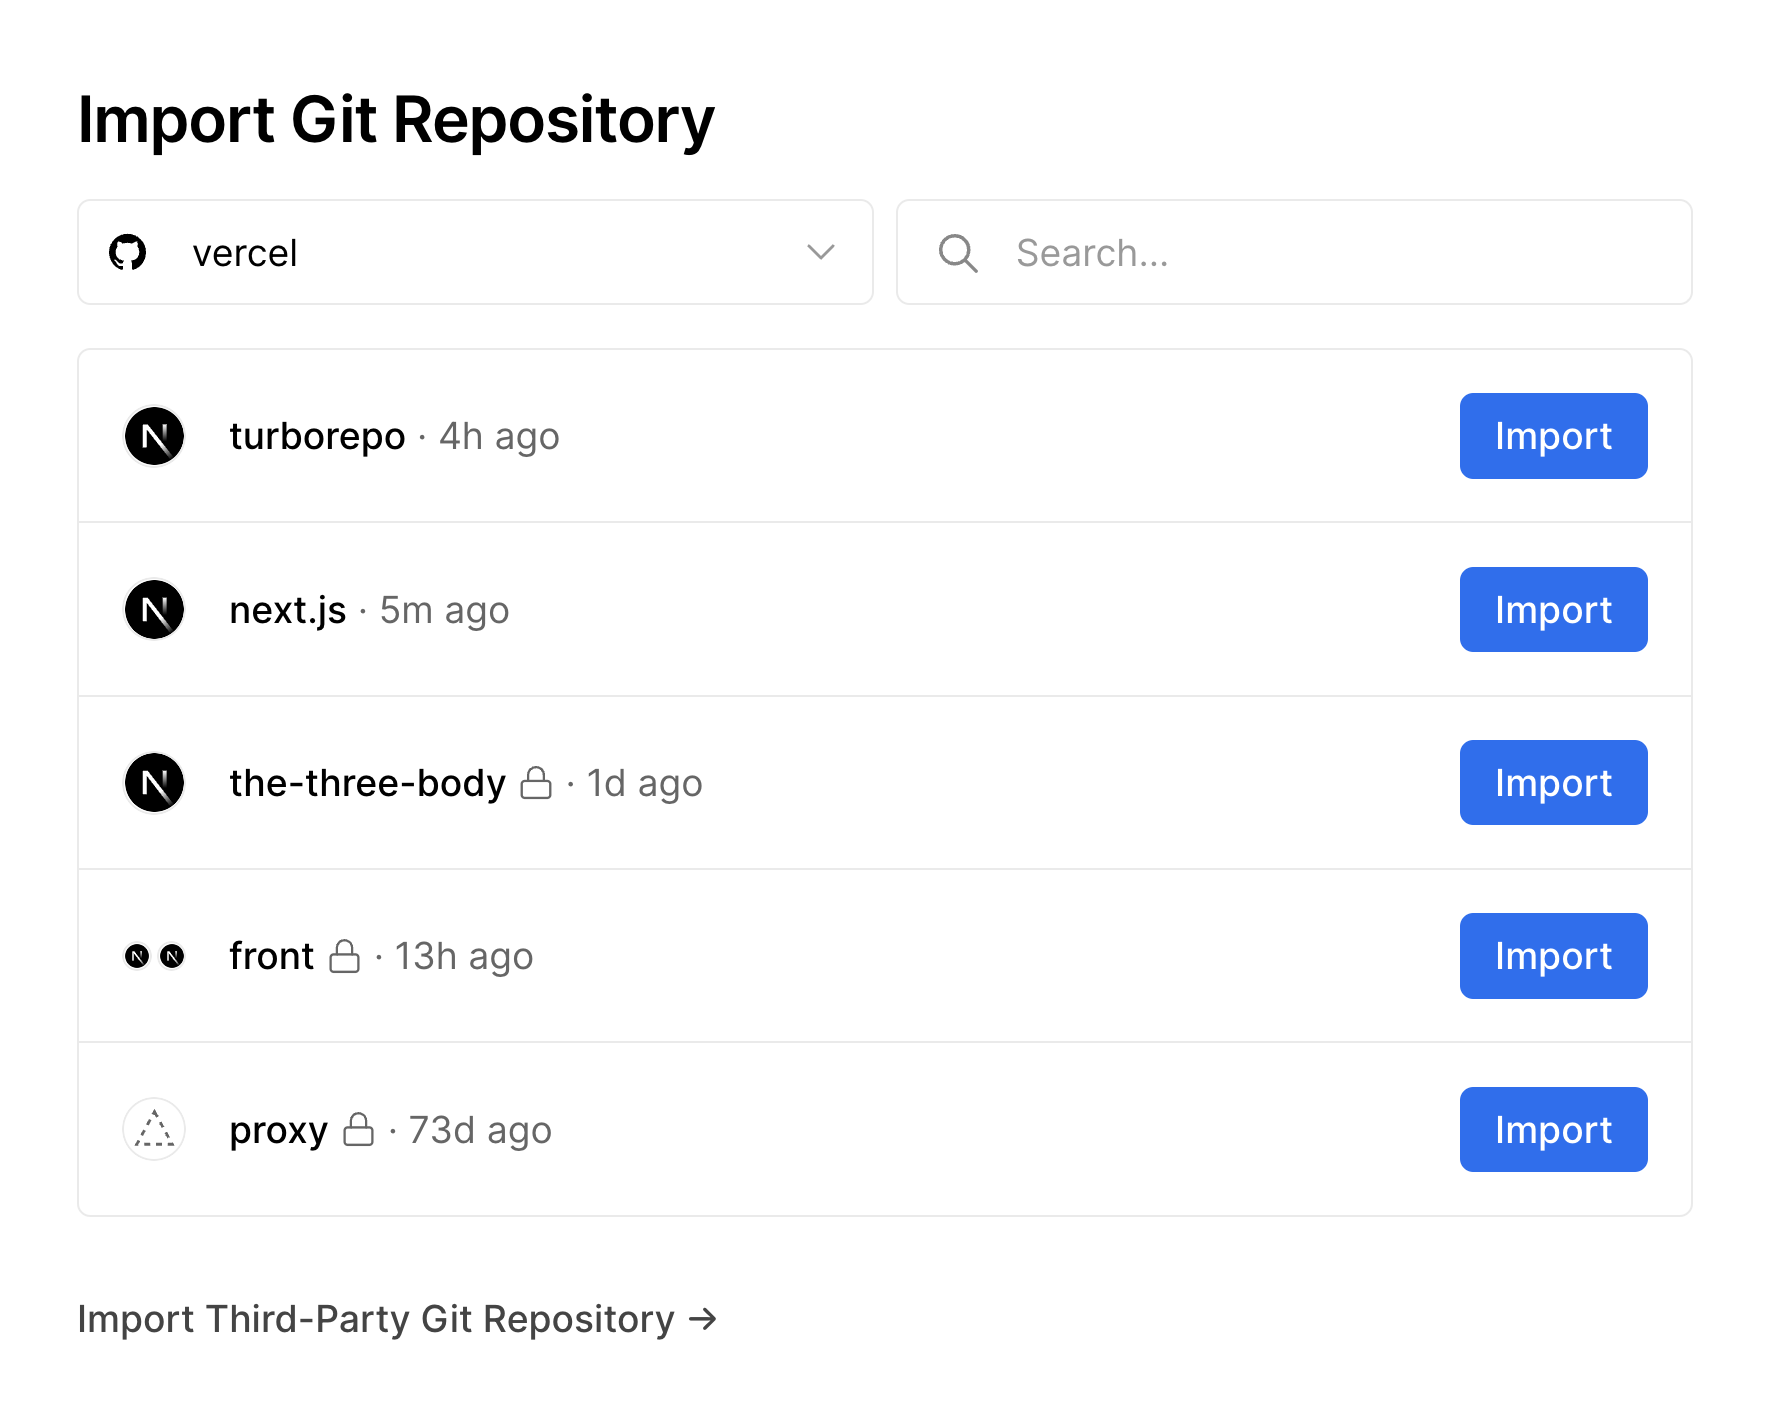
In Vercel, select the intended GitHub account and import only the repository you want to preview. Open the image to inspect the full-size capture.
C
Claude Code path
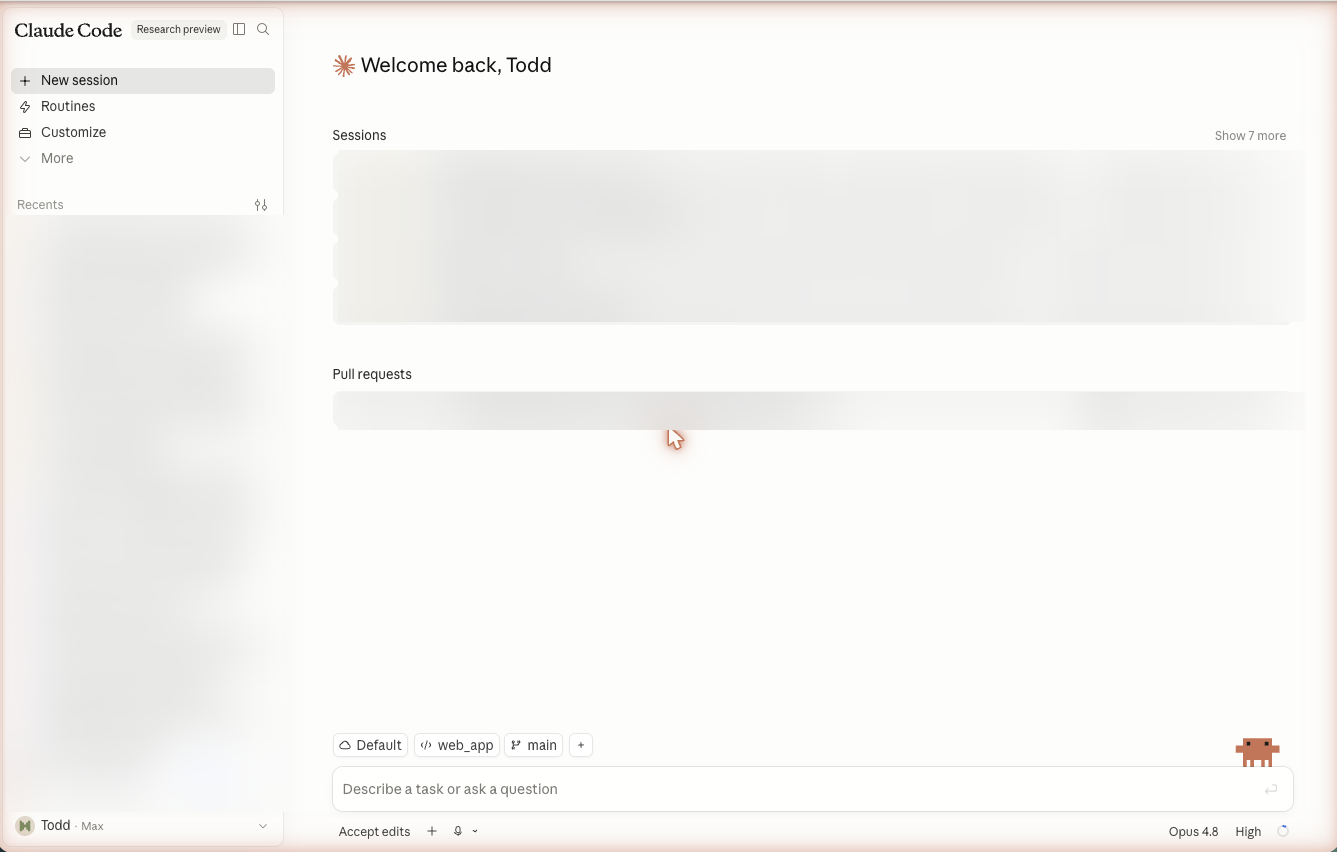
Keep edit approval visible and inspect each proposed change before accepting it. Open the image to inspect the full-size capture.
Do this
1
Open Vercel's signup page and choose Continue with GitHub. Sign into the approved GitHub account, review the requested access, then authorize Vercel.
2
Complete any email or account verification Vercel requests. Confirm the account name and starting plan, and do not create a paid team or enter billing details unless an accountable owner approved it.
3
Open the Vercel dashboard. From the correct personal account or organization team, choose Add New, then Project. If your organization already has a Vercel team, use its invitation instead of creating another team.
4
Grant Vercel access only to the practice repository when that option is available. Find the repository in Import Git Repository and select Import.
5
Review the project name, framework preset, root directory, build settings, and environment variables. Leave secrets out of the repository; add only required values through the approved Vercel environment controls.
6
Confirm the repository contains only safe practice content, select Deploy, and open the baseline URL. Do not add a custom domain yet.
7
Back in Claude Code, ask it to create a branch and make one small, reviewable README change. Inspect the diff before approving a commit or push, then open the Vercel preview created for that branch.
Open Vercel's signup page and choose Continue with GitHub. Sign into the approved GitHub account, review the requested access, then authorize Vercel.
2
Complete any email or account verification Vercel requests. Confirm the account name and starting plan, and do not create a paid team or enter billing details unless an accountable owner approved it.
3
Open the Vercel dashboard. From the correct personal account or organization team, choose Add New, then Project. If your organization already has a Vercel team, use its invitation instead of creating another team.
4
Grant Vercel access only to the practice repository when that option is available. Find the repository in Import Git Repository and select Import.
5
Review the project name, framework preset, root directory, build settings, and environment variables. Leave secrets out of the repository; add only required values through the approved Vercel environment controls.
6
Confirm the repository contains only safe practice content, select Deploy, and open the baseline URL. Do not add a custom domain yet.
7
Back in Codex, ask it to create a branch and make one small, reviewable README change. Inspect the diff before approving a commit or push, then open the Vercel preview created for that branch.
The approved GitHub repository is connected to the correct Vercel account or team, and a reviewed working branch creates a separate preview URL before later changes are merged to the production branch.
Check before moving on
The Vercel project points to the intended GitHub owner, repository, production branch, and root directory.
The preview URL shows only the reviewed change from the test branch.
The coding app's diff, the GitHub branch, and the Vercel preview describe the same change.
No secret appears in git history, the browser address, build output, or the previewed page.
Human stop rule: Do not merge to the production branch, attach a production domain, expose a secret, or deploy inside an employer's Vercel team without the repository owner and accountable reviewer approving it.
If this step fails
The repository is missing in Vercel: check the selected GitHub account and update the Vercel GitHub integration to grant access to that repository only.
The deployment fails: open the Vercel build log, copy the first actionable error into the same coding-app task, and ask for a diagnosis before allowing another change.
The preview does not match the branch: confirm the commit, branch name, root directory, and deployment source before trying again.